|
 06-21-2017, 06:36 PM
|
#1
|
|
Weekend Camper
Join Date: Jun 2017
Location: Ohio
Posts: 15
|
Bubble level installation
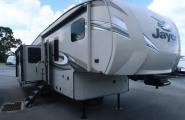
I have a new 2017 ST 254RB. It's the first travel trailer Ive ever owned, so Im very new to all this. My question, what is the proper method to installing an exterior bubble level? Where exactly should I put it? On the front center? On the trailer tongue? One on each corner?
Im assuming the trailer has to be perfectly level before permanently mounting a bubble level, so how does one do that? Sorry for the silly questions, but like I said, Im new! 😊
Comments or Suggestions? Thanks!!!!
Tad
|

|

|
|
06-21-2017, 07:05 PM
|
#2
|
|
Site Team
Join Date: Dec 2007
Location: WI.
Posts: 9,160
|
A nice cement floor would be a great place to be able to do the leveling.
Yes, you are correct. The trailer should be as level as you can get it. Side to side and front to back. If you have a two ft. level, get the floor of the trailer level side to side just inside the door is OK. Then level it front to back. Either going off the frame or just inside the door again. Some people like to use a bubble level inside the fridge.
Once you are satisfied with it being level, put the exterior bubble levels where it's convenient for you to see them.
Mine are on the front left corner (for side to side) and the side front corner (front to back).
|
|
|
|
|
06-21-2017, 08:06 PM
|
#3
|
|
Weekend Camper
Join Date: Jun 2017
Location: Ohio
Posts: 15
|
Quote:
Originally Posted by Lloyd

A nice cement floor would be a great place to be able to do the leveling.
Yes, you are correct. The trailer should be as level as you can get it. Side to side and front to back. If you have a two ft. level, get the floor of the trailer level side to side just inside the door is OK. Then level it front to back. Either going off the frame or just inside the door again. Some people like to use a bubble level inside the fridge.
Once you are satisfied with it being level, put the exterior bubble levels where it's convenient for you to see them.
Mine are on the front left corner (for side to side) and the side front corner (front to back).
|
Thanks for the reply and for the info! Unfortunately I dont have a solid concrete surface to park it on, but Ill try my best to do what I can in the driveway. If not, maybe Ill see if I can find a vacant parking lot somewhere.
Thanks again!!
|
|
|
|
|
06-21-2017, 08:30 PM
|
#4
|
|
Full Time Camper
Join Date: Feb 2015
Location: SC
Posts: 679
|
Quote:
Originally Posted by ssnova1
Thanks for the reply and for the info! Unfortunately I dont have a solid concrete surface to park it on, but Ill try my best to do what I can in the driveway. If not, maybe Ill see if I can find a vacant parking lot somewhere.
Thanks again!!
|
Level it in your driveway as you would at a campsite. Use blocks under the low tire(s), and use your tongue jack for front to back. Use a regular level at various places on the interior floor. Once you've got it right, then you can place your exterior bubble levels wherever you want them.
__________________
Marty and Martha
2015 Z-1 211RD
2012 Nissan Titan
Dalzell SC
|
|
|
|
|
06-21-2017, 09:17 PM
|
#5
|
|
Weekend Camper
Join Date: Jun 2017
Location: Ohio
Posts: 15
|
Quote:
Originally Posted by MartyinSC
Level it in your driveway as you would at a campsite. Use blocks under the low tire(s), and use your tongue jack for front to back. Use a regular level at various places on the interior floor. Once you've got it right, then you can place your exterior bubble levels wherever you want them.
|
Awesome! Thanks! I'll give it a try this weekend! Hopefully all goes well! I appreciate the help!
|
|
|
|
|
06-22-2017, 09:34 AM
|
#6
|
|
Full Time Camper
Join Date: Aug 2012
Location: Belle River , Ontario
Posts: 1,753
|
I put the side one right under the front awning arm . Inconspicuous and won't get accidentally hit. And the front one right behind the propane tanks under the arch.if that makes sense .
__________________
It was a rainy few days at Algonquin Prov park...tarps kept us dry.
Wayne --Belle River (Windsor), Ontario
2013 Sunset Trail Reserve 25RB..(just sold it)
2015 White Chev Silverado 2500HD 4x4 (6.0 l gasser)
2003 Mountain Star 890SBRX Truck Camper
|
|
|
|
|
06-22-2017, 01:25 PM
|
#7
|
|
Full Time Camper
Join Date: May 2012
Location: N.C. Mountains
Posts: 2,415
|
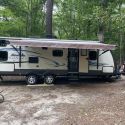
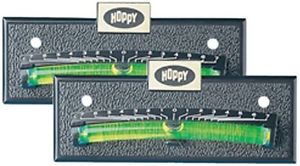
I put a small level on the side of ours where I can see it while raising the front up and down. Here's a picture of it on the side of ours. 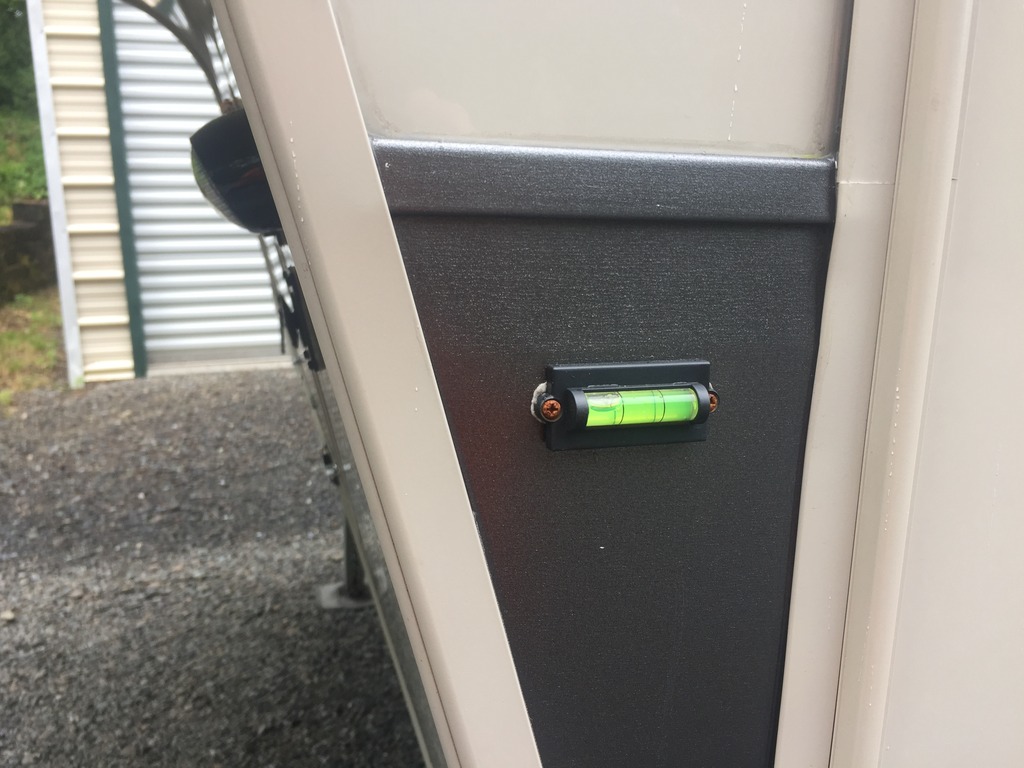 For side to side leveling I use the round bubble center level like this one.  I go inside when I get where I want to be parked and set it on the floor to see if I need the pull one side up on blocks.
__________________
*2016 CAF25SE Cruiser Aire 5er. *2020 Chevrolet 2500 HD Custom
*Ted & Tricia (Mimi - Teacup Poodle/ Sailor - Maltipoo)
*I have tried to live my life so that my family would love me and my friends would respect me. The others can do whatever the Hell they please! John Wayne
|
|
|
|
|
06-22-2017, 01:46 PM
|
#8
|
|
Full Time Camper
Join Date: Jul 2013
Location: DFW, TexUS
Posts: 1,032
|
What they said....
and
When I first got our rv's I would level mine out whichever way I wanted, and then I placed a large bubble level on the drivers front of my tt and 5'er so I could see it in the side mirror like where the red rectangle is in this old pic)
You can CERTAINLY see this one from the drivers seat  but I got one a bit smaller than that
that way while still hookup many times I can move a bit forward or back to find the side to side level spot without getting out of the truck
then drop the rv and level front to back...
__________________

|
|
|
|
|
06-22-2017, 06:35 PM
|
#9
|
|
Site Team
Join Date: Sep 2012
Location: PA
Posts: 5,721
|
__________________
Mark & Susan
Lehighton, Pennsylvania
EAGLE HT FIFTH WHEEL | 30.5CKTS - '13 Ford F150 SCREW - PullRite Superslide - Roadmaster Active Suspension
Member - "Northeast Adventures RV Rally Group" & "Mason-Dixon Bunch" |
|
|
|
|
06-23-2017, 04:25 AM
|
#10
|
|
Weekend Camper
Join Date: Jun 2017
Location: Ohio
Posts: 15
|
Quote:
Originally Posted by harley
I put the side one right under the front awning arm . Inconspicuous and won't get accidentally hit. And the front one right behind the propane tanks under the arch.if that makes sense .
|
Good idea! Thanks for the suggestion!
|
|
|
|
|
06-23-2017, 08:56 AM
|
#11
|
|
Seasonal Camper
Join Date: Jul 2009
Location: Idaho
Posts: 393
|
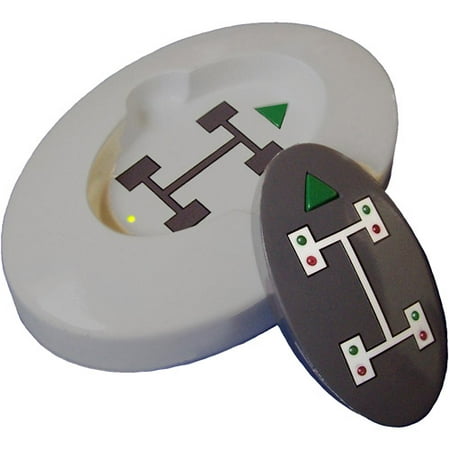
I use these for my levels.
They come with several different scales. With a little testing you will find a scale that is very close.
I like the scale as when I need to add leveling blocks the scale indicates how many inches of leveling block is needed. I have found when it indicates 2 inches that is exactly how much leveling block is required.
Also with my 5th wheel when I have raised the 5th wheel to the height to disconnect I note the reading on the level. Then when it is time to reconnect I raise the trailer to that point and then the trailer is at the correct height to reconnect.
|
|
|
|
|
06-23-2017, 03:14 PM
|
#12
|
|
Weekend Camper
Join Date: Jun 2017
Location: Ohio
Posts: 15
|
Quote:
Originally Posted by Papa-T
I put a small level on the side of ours where I can see it while raising the front up and down. Here's a picture of it on the side of ours.  For side to side leveling I use the round bubble center level like this one. 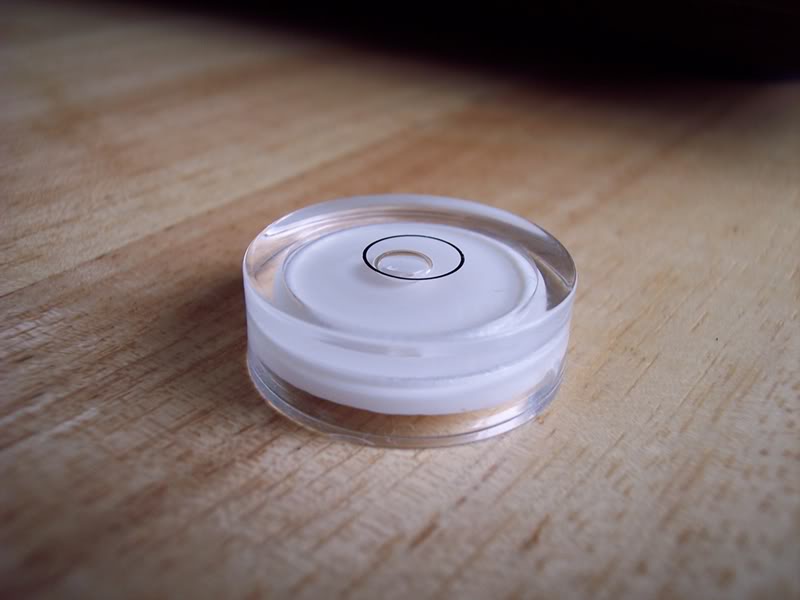 I go inside when I get where I want to be parked and set it on the floor to see if I need the pull one side up on blocks. |
Thank you for the pics! Good ideas! Very helpful!
|
|
|
|
|
06-23-2017, 03:15 PM
|
#13
|
|
Weekend Camper
Join Date: Jun 2017
Location: Ohio
Posts: 15
|
Thanks!! I was checking those levels out on youtube last night haha
|
|
|
|
|
 Posting Rules
|
You may not post new threads
You may not post replies
You may not post attachments
You may not edit your posts
HTML code is Off
|
|
|
|
 » Recent Threads
 |
|
|
|
|
|
|
|
|
|
|
|
|
|
|
|
|
|
|
|
|
|
|
|
|
|
|
|
|
|
|
|


 Linear Mode