|
 06-25-2022, 10:41 PM
|
#1
|
|
Weekend Camper
Join Date: Jun 2022
Location: Ca
Posts: 31
|
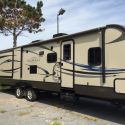
Floor rot on my slide. Just a run through of my fix job.
This is my experience of what I am having to do for my floor rot. This is intended to give ideas, show my process, and hopefully help. I encourage anyone that has or is going through this issue to give your different ideas if yall have any. : ).
So my wife and I just picked up this Zinger 29BS fifth wheel from my cousin back east in Missouri. Got it home, put the slides out, the living room slide showed light through the floor indicating floor wall separation. I removed the carpet, and saw how bad it was. After removing the floor board, i noticed the wall boards were also rotten and pretty much non existent. So i removed the wall in sections to find out how high up the wood wall frame the rot went. I used an Oscillating multi tool to remove all the wood and wall pieces. (PS, THERE ARE A LOT OF STAPLES!!!!!)
|

|

|
|
06-25-2022, 11:00 PM
|
#2
|
|
Weekend Camper
Join Date: Jun 2022
Location: Ca
Posts: 31
|
Continued
After removing all the rotten wood, i used a vacuum and cleaned up all the dust and staples and rusted screws, just clean up because you dont want a dirty restart. Then measured all the pieces that were cut out. I could not find the exact size i needed at the hardwood store, so i ripped a larger piece of wood down to the correct size. After cutting all my pieces, including the floor board, I water proofed every piece of wood before reinstalling.
REINSTALLATION
After all the waterproofing dried, i got a regular tarp you can get at any hardwood store and cut it larger than the floor board itself. (PS. The floorboard size is 23/32 thick. I then wrapped the floorboard and used 1/2 staples to attach the tarp to the floorboard. I did not cut the corners, i folded and creased and flattened all the corners and stapled the heck out of all the creases and folds. (PS. Be sure to water proof the entire board, top, bottom, and all sides). (PS PS. I used stainless screws to reduce risk of nasty rusty screws if exposed to water.) If pieces of the frame or if anything is screwed anywhere. Make sure you put screws or staples or whatever was there back where it belongs. Preferably new. Do not reuse the old screws with new wood.
|
|
|
|
|
06-25-2022, 11:24 PM
|
#3
|
|
Weekend Camper
Join Date: Jun 2022
Location: Ca
Posts: 31
|
Continued
When reinstalling new wood, I personally used Gorilla construction glue in the caulking tube form. That will give it some stickiness, sealant, and some elasticity because the gorilla construction glue i noticed does not harden. Just very sticky and holds extremely well.
After glueing pieces, i secured with more stainless screws. Where the splice is for the wall frame boards are, i bought some corner splices and screwed them together. Tighter the fit, the better. Also be sure to put some silicon on the corner splices over the holes before you screw them on. That way the screws going into the wood do not expose wood to water or air. Just my way of being 100% on the water proofing. I do not want to go through all of this again. Haha. After you get all the rotten wood R&R, I put a jack under the slide out wall frame board as close to the trailer as possible. (PS. YOUR MAIN OBJECTIVE HERE IS TO LIFT SLIDE OUT A LITTLE BIT IN ORDER TO GET A WEDGE OF SOME SORT UNDER THE SLIDE OUT WALL TO GIVE YOU A GAP TO SLIDE THE NEW FLOOR BOARD INTO PLACE. AFTER PUTTING THE WEDGE OF SOME SORT IN PLACE, REMOVE THE JACK). Slide the new floor board into place and apply all necessary screws and bolts to hold in place. (PS. DO NOT STAPLE OR SCREW THROUGH THE BOTTOM OF THE FLOOR BOARD (ie. outside under the slide) YOU DO NOT WANT ANY HOLES IN THE COVER FOR THE FLOOR BOARD. REMEMBER!!!!!!!!! Water tight!!!!!!
Now for the plastic outside corner piece that i am guessing is suppose to keep water from getting onto the floor board under the slide. I removed that and installed a 2x2x1/16 piece of aluminum angle and cut to length. Now slide that between the floor board and the outside wall panel. I used silicon on the angle in order to water proof and keep water from getting between the angle and the floor board. Keeps water out. And the 1/16 aluminum angle has a nice sharp outside corner on it to give a great drip edge instead of that plastic piece that is really rounded and allows water to creep back to the edge of the plastic and the seep through the weather proofing stuff under the slide out.
This is as far as I have gotten so far. I will keep posting and giving updates everyone. Hopefully this will help someone in the same situation.
|
|
|
|
|
06-26-2022, 07:31 AM
|
#4
|
|
Site Team
Join Date: Dec 2007
Location: WI.
Posts: 9,160
|
That's one heck of an undertaking! Very nice write up so far. 
Now, while you are at it, check all the gaskets and seals on that slide out. They are more than likely the original ones. I recommend replacing them. Also, if there isn't a topper over the slide, that would be a good addition too. Those thing prevent a lot of water from running in.
|

|
|
|
06-26-2022, 11:13 AM
|
#5
|
|
Weekend Camper
Join Date: Jun 2022
Location: Ca
Posts: 31
|
Quote:
Originally Posted by Lloyd

That's one heck of an undertaking! Very nice write up so far.
Now, while you are at it, check all the gaskets and seals on that slide out. They are more than likely the original ones. I recommend replacing them. Also, if there isn't a topper over the slide, that would be a good addition too. Those thing prevent a lot of water from running in. |
Ahhhhh. Excellent idear. Never even thought about the slide cover. And the seals what am i looking for? I know holes or rips and tares. None of them have anything like that. They are all flexible not dry. Anything else to check?
|
|
|
|
|
06-26-2022, 11:17 AM
|
#6
|
|
Site Team
Join Date: Dec 2007
Location: WI.
Posts: 9,160
|
Any, and all, caulking. (roof also) Is there any windows in that area? How about any other openings that were cut in the wall for what ever the need was? Clearance/running lights?
|
|
|
|
|
06-26-2022, 11:19 AM
|
#7
|
|
Site Team
Join Date: Dec 2007
Location: WI.
Posts: 9,160
|
I suppose the cousin told you about the issue huh?
Gotta love those cousins. 
|
|
|
|
|
06-26-2022, 12:04 PM
|
#8
|
|
Weekend Camper
Join Date: Jun 2022
Location: Ca
Posts: 31
|
Quote:
Originally Posted by Lloyd
Any, and all, caulking. (roof also) Is there any windows in that area? How about any other openings that were cut in the wall for what ever the need was? Clearance/running lights?
|
Yes, they told me there was something wrong with the floor when we were sliding it out at the camp ground. There was no getting around it, it made sooooooo much noise sliding out. It was the plastic weather guard on the bottom that was all messed up. So when i got home i figured it out. Its all good. The price for the trailer you would think it needed to be gut and remodeled. But its actually in great shape for the age.
Cousin said all caulking redone a year ago. There are a couple spots on the slide i need to redo due to the rot issue. But everywhere else is great. Thank you for all the great information and help. Keep it coming. Haha
|
|
|
|
|
06-26-2022, 07:22 PM
|
#9
|
|
Site Team
Join Date: Jun 2015
Location: mo
Posts: 2,105
|
Good job on the repairs and documenting the progress!
__________________
2009 Seville VF32KS
2019 GMC Sierra 3500HD Crew Cab Denali.
6.6 Diesel standard box.
|
|
|
|
|
06-26-2022, 08:40 PM
|
#10
|
|
Weekend Camper
Join Date: Jun 2022
Location: Ca
Posts: 31
|
Quote:
Originally Posted by dagst1
Good job on the repairs and documenting the progress!
|
Thank you. Im trying. We went and picked it up at the right time. But to bad all this is going on in the middle of camping season. Haha
|
|
|
|
|
06-29-2022, 03:47 PM
|
#11
|
|
Weekend Camper
Join Date: Jun 2022
Location: Ca
Posts: 31
|
Just wanted to update
. So many hours and many trial and errors and lots of trips to Lowes for stuff. I finally finished one side of the slide out. Not wallpapered or floored yet. But its ready for all the finishes that the wife wants to throw at it. Haha.
So went to Lowes, got some of their 1/4 wall board because that was the thinnest board they sell, took it home. Measured the space, used a jigsaw to cut, used the same gorilla construction glue to glue to the studs, and some 1/2 T50 staples and an air staple gun run at 85 psi to put them through the wood. Worked great and that glue is awesome.
Another lowes trip day, i picked up some 19/32 plywood, had it cut to size needed for slide out, belt sander,, and take your time and sand a nice smooth slope. My slope is 3 wide and from 19/32 down to 1/4. This allows the new vinyl flooring to slope down instead of hanging over an edge you will most likely trip on. Since it is inside, and the vinyl floor is waterproof, i did not waterproof this piece of plywood. I did wrap the front edge with a tarp just in my mind a little more ware and tare longevity.
Now
..for the screw it down part
since there is no structure under that original piece of floor board, it had a concave shape to it. The floorboard i put in place of the rotten piece i cut out did not have concave shape. It is flat. So dont just go laying down your new top floorboard and start screwing it in wherever you feel like. What I ended up doing was going underneath the slide and pushing up to flush out the old board and new board, have someone inside the rv with the drill and screws( I used 1-1/4 wood screws, 19/32 plywood and 23/32 plywood which ends up giving about 3/16-1/8 to spare before putting a hole through to the bottom of the floor.) i will post again in a little about about the sequencing i did screwing it all together.
|
|
|
|
|
08-07-2022, 09:28 PM
|
#12
|
|
Weekend Camper
Join Date: Jun 2022
Location: Ca
Posts: 31
|
These are to show how i jacked the slide up.
|
|
|
|
|
08-07-2022, 09:35 PM
|
#13
|
|
Weekend Camper
Join Date: Jun 2022
Location: Ca
Posts: 31
|
I used aluminum HVAC tape for all of the seems, cracks and areas of loose tarp or whatever it is that is wrapped on the floor board.
|
|
|
|
|
08-07-2022, 09:37 PM
|
#14
|
|
Weekend Camper
Join Date: Jun 2022
Location: Ca
Posts: 31
|
We are now putting wall paper up, then the floor will be put in finally. Then i can put the furniture back in. Finally.
|
|
|
|
|
08-08-2022, 11:00 AM
|
#15
|
|
Site Team
Join Date: Sep 2012
Location: PA
Posts: 5,721
|
Looks great so far, a lot of work. I'm sure it will be better then the original.
__________________
Mark & Susan
Lehighton, Pennsylvania
EAGLE HT FIFTH WHEEL | 30.5CKTS - '13 Ford F150 SCREW - PullRite Superslide - Roadmaster Active Suspension
Member - "Northeast Adventures RV Rally Group" & "Mason-Dixon Bunch" |
|
|
|
|
08-16-2022, 06:16 PM
|
#16
|
|
Weekend Camper
Join Date: Jun 2022
Location: Ca
Posts: 31
|
Welllllll. All that work i did and explaining about the process of putting the piece of alluminum angle and the reasoning behind it. I ended up having to take them off. My slide system, the whole floor slides on a thick piece of plastic that runs the length of the slide. I do not have rollers or any other type of slide system. Mine is extremely plain and boring. BUT!!!! The reason i took the aluminum angle off is because when sliding the slide back in, that 1/16 aluminum would catch something fierce every time. And it just sounded absolutely terrible. Another reason is when bringing the slide back in, the slide would get over the threshold and teeter down setting the aluminum on the floor at an angle which would then just absolutely destroy my floor for the 6 it would be touching. Luckily it was the old flooring that we will be taking out. I removed the aluminum and ran the slide in and out a couple times and it runs like a top.
In closing, I would highly recommend making sure you have a slide system that does not slide on the entire floor of the slide out. Make sure there is nothing to get caught on. The rest of the process is still a good idea and i recommend doing everything else. The aluminum is also a good idea for the correct systems. Good luck everyone.
|
|
|
|
|
| Thread Tools |
Search this Thread |
|
|
|
| Display Modes |
 Linear Mode Linear Mode
|
 Posting Rules
|
You may not post new threads
You may not post replies
You may not post attachments
You may not edit your posts
HTML code is Off
|
|
|
|
 » Recent Threads
 |
|
|
|
|
|
|
|
|
|
|
|
|
|
|
|
|
|
|
|
|
|
|
|
|
|
|
|
|
|
|
|