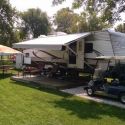
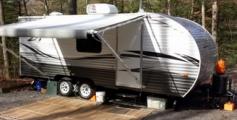
When we bought our Zinger brand new, we knew from the get go it was going get some enhancements.
We saw it as more or less a blank canvas, with maybe just the sky, horizon and some grass painted on in the foreground, but little else.
The moment we got it home out came the paint, metaphorical in this case of course.
Immediately we added drawers under either side at the foot of the bed so we don't need to lift the bed platform anymore. We added full seat length drawers under the dinette so that space is utilized to the max.
In the bathroom we added a cupboard over the loo and a cubby under the sink. With the installation of a shore power connector we eliminated the need to stuff the cord into a void under the pantry and earned a couple or three cubic feet under there which neatly stores our pooch's supplies.
We thought we'd pretty much found every bit of space and had a finished masterpiece (in our eyes anyway) and then we saw it.
While stretched out on our recliners watching the TV one evening, out of the blue my wife asked "How deep is the mechanism beneath our jack knife sofa?"
I said "I really don't know, lets have a look".
To my amazement, the void under there is nearly thirty inches deep, just under six feet long and almost eleven inches from springs to carpet.
The cogs started turning and soon we had a plan.
The lower front padded panel was secured by just two screws and does nothing except hide the space under the seat. Below is what it looks like with the panel removed exposing the void.

I wondered if it added support to the seat above, but in all positions it offers no support whatsoever. Once it was off, we sat, lay, and bounced on the sofa. Aside from the fun of bouncing on the furniture (my Mum always told me off for doing that) we proved the panel is purely decorative, but more importantly saw that the springs under load wouldn't infringe on the available space.
We opted for a drawer with internal dimensions of 48" x 24" and a depth of 6". This simplified construction using readily available 'Home Depot' pre-cut sheet materials, namely 1/4" ply for the floor.

We had some surplus 1/2" sand ply which I ripped 7" wide to make the back and sides then reinforced the floor with 1" x 2" also from HD.
The 24" full extension drawer glides are mounted to support rails made from off cuts of lumber. I mounted the glides 1/4" lower at the back so gravity will help keep this mammoth drawer closed.

After a couple of coats of clear sealer, and a very light sanding the silky smooth drawer assembly, with glides and rails attached was located centrally under the sofa using eight stainless steel screws of a length not the penetrate the slide out floor.

We needed to cut down the front panel vertically by about an inch to clear the slight drop down of the front edge of the sofa seat. We had to remove the top row of staples securing
the upholstery, cut the substrate and foam, then re-staple. Took all of about twenty minutes.
Once done, the panel was clamped to the front of the drawer and eight screws run through from inside the drawer into the substrate.

Having some lumber laying around saved me a few pennies, total out of pocket for this was about thirty five bucks, seventeen of which were the drawer glides. I spent a couple of hours in the workshop and about half as much again for the final installation. This was three hours well spent, and gained us some valuable storage space.

I seriously don't think there is any more space to find in this trailer, I can finally pack away the paints and easel..........maybe in that great big new drawer under the sofa.


 Nice.
Nice.

 Linear Mode